Odoo is a powerful, all-in-one business management software with a comprehensive suite of applications for various business needs, including CRM, accounting, inventory, and more. This guide provides a detailed walkthrough for installing Odoo 18 on an Ubuntu 22.04 server and above.
Prerequisites
- An Ubuntu 22.04+ server with at least 2GB of RAM and a 2-core CPU.
- SSH access to the server with sudo privileges.
Step 1: Update System Packages
Start by updating and upgrading your server's package list to ensure all existing packages are up to date.

Step 2: Install PostgreSQL
Odoo uses PostgreSQL as its database backend. Install it and start the service.
Odoo uses PostgreSQL as its database backend. Install it and start the service.
Step 2: Install PostgreSQL
Odoo uses PostgreSQL as its database backend. Install it and start the service.

After installation, you can verify the service status with: systemctl status postgresql
Step 3: Create a System User and PostgreSQL User
For security, it's best to run Odoo under a dedicated system user, not as the root user. Create a system user named odoo and a corresponding PostgreSQL user with the same name.

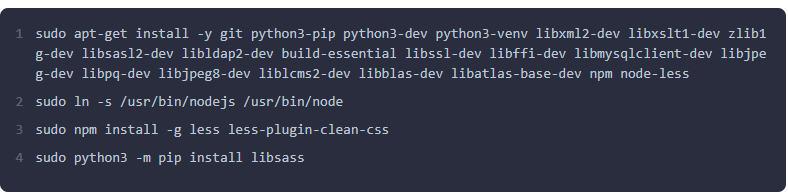
Step 4: Install Required Dependencies
Odoo is built on Python, and it requires several dependencies to run correctly. Install the necessary packages.
Step 5: Install Wkhtmltopdf
Wkhtmltopdf is an essential tool for generating PDF reports in Odoo. Odoo 18 requires a specific version. Download and install it using the following commands:

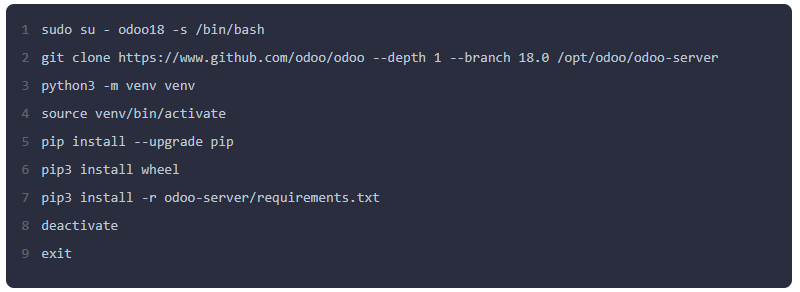
Step 6: Clone Odoo 18 from GitHub and Set Up a Virtual Environment
Switch to the odoo user and clone the Odoo 18 source code from its official GitHub repository. It's recommended to install the Python dependencies in a virtual environment.
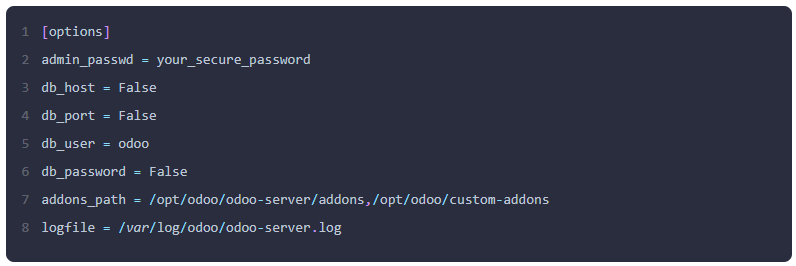
Step 7: Create the Odoo Configuration File
Create a configuration file to define Odoo's settings, such as the database user, host, and addons path.
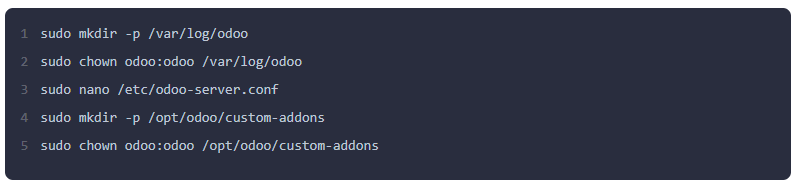
Paste the following content, adjusting the admin_passwd and other settings as needed:
Save and close the file. Then, set the appropriate permissions.

Step 8: Create a Systemd Service File
To manage Odoo as a service, create a systemd unit file that allows you to start, stop, and restart the application easily.

Add the following content to the file:
Save and close the file.
Reload the systemd daemon and enable and start the service.

Step 9: Access Odoo
Once the service is active, you can access your Odoo instance by navigating to your server's IP address or domain on port 8069.
http://your_server_ip:8069
Alternative Installation Methods
While the manual installation provides a great understanding of the system, you can also use automated scripts to streamline the process.
Using a Bash Script: Many Odoo developers create scripts that automate the entire installation process. A popular odoo 18 install script from a company like HeliconiaIO can be downloaded and run with a few commands, handling all dependencies, users, and service configuration for you. You typically just need to configure a few variables at the top of the script.

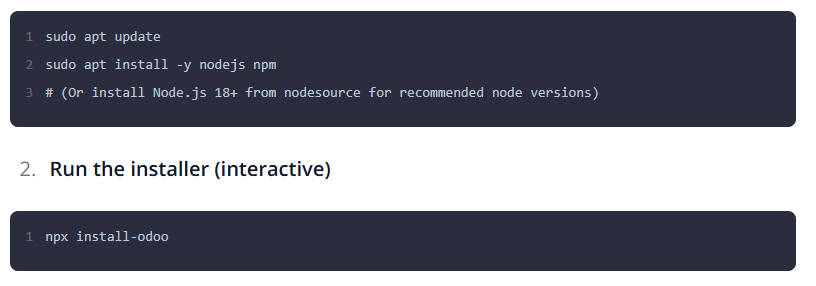
Using install-odoo CLI: For those who prefer a command-line interface (CLI) tool, a Node.js package like install-odoo can manage the setup. This method simplifies the process, particularly for developers who are already using Node.js and npm. You would install the CLI tool globally and then use a single command to install a new Odoo instance.